Showing posts with label Housework. Show all posts

Wednesday, February 6, 2013

Living Room Organization

This week I am sharing what I did last week in my home!  I focused on cleaning & organizing The Living Room!  To get ideas for your own "Tackle It Tuesday" project or to see what other bloggers are sharing, check out Tackle It Tuesday at 5 Minutes For Mom!


Last week (Jan. 28 thru 31st) was a time to focus on Zone 5 (FlyLady.net).  Each week FlyLady has a different "zone" or area of the home that you focus on for decluttering or deep-cleaning.  So this I a big part of why I focused on my Living Room last week!
 

This week's organization was also inspired by the Home Organization 101 Challenge at A Bowl Full of Lemons!  Check out this awesome livingroom and see where I got my inspiration and see what other bloggers did in their Living rooms as well!


First of all, my Living Room was DUSTY!  One of the joys of living in the desert!  Dust gets everywhere and builds up very quickly!  I had neglected dusting in here for awhile as you can see with the following before and after pictures!
I loved using Shaklee's Basic H2 for dusting!  Just a little spray on a towel and I was able to get all my surfaces super shiny, without any chemical smell, and with the peace of mind of knowing I used a safe & healthy product!
 
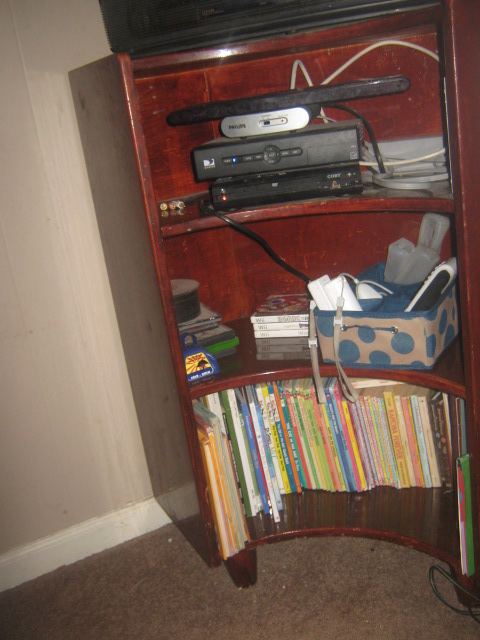
 Moving on... the shelves under the tv were a bit cluttered! 
 I sorted through the books and got rid of quite a few that the kids had outgrown.  Some of the books were moved to the girls' bedroom.  What was left all fit on the bottom shelf, leaving the middle shelf open for video games and a few DVD's.  The canvas caddy box with blue spots on it now serves as a storage bin for remote controls and game controllers.
This corner was very cluttered!  A lot of papers and miscellaneous stuff, but most of it was my hubby's guitar stuff.  (Guitar strings, picks, supplies, and books)  He has been teaching himself to play guitar over the past couple of years.

I straightened up the table, and put all hubby's guitar related stuff in a basket! 

Now it looks like this!  Hubby's two guitars, Miss Z's Guitar.  The window unit A/C is tucked under the small table for storage until summer when we need it again.  I even framed and hung up a picture above the table to add some more decoration to the room!
 
It's a picture of Jerry Garcia!  Drawn by my very talented brother.  He did this in an art class in college.  I'm glad it finally has a home, displayed above our little "Music Corner" in the Living Room!

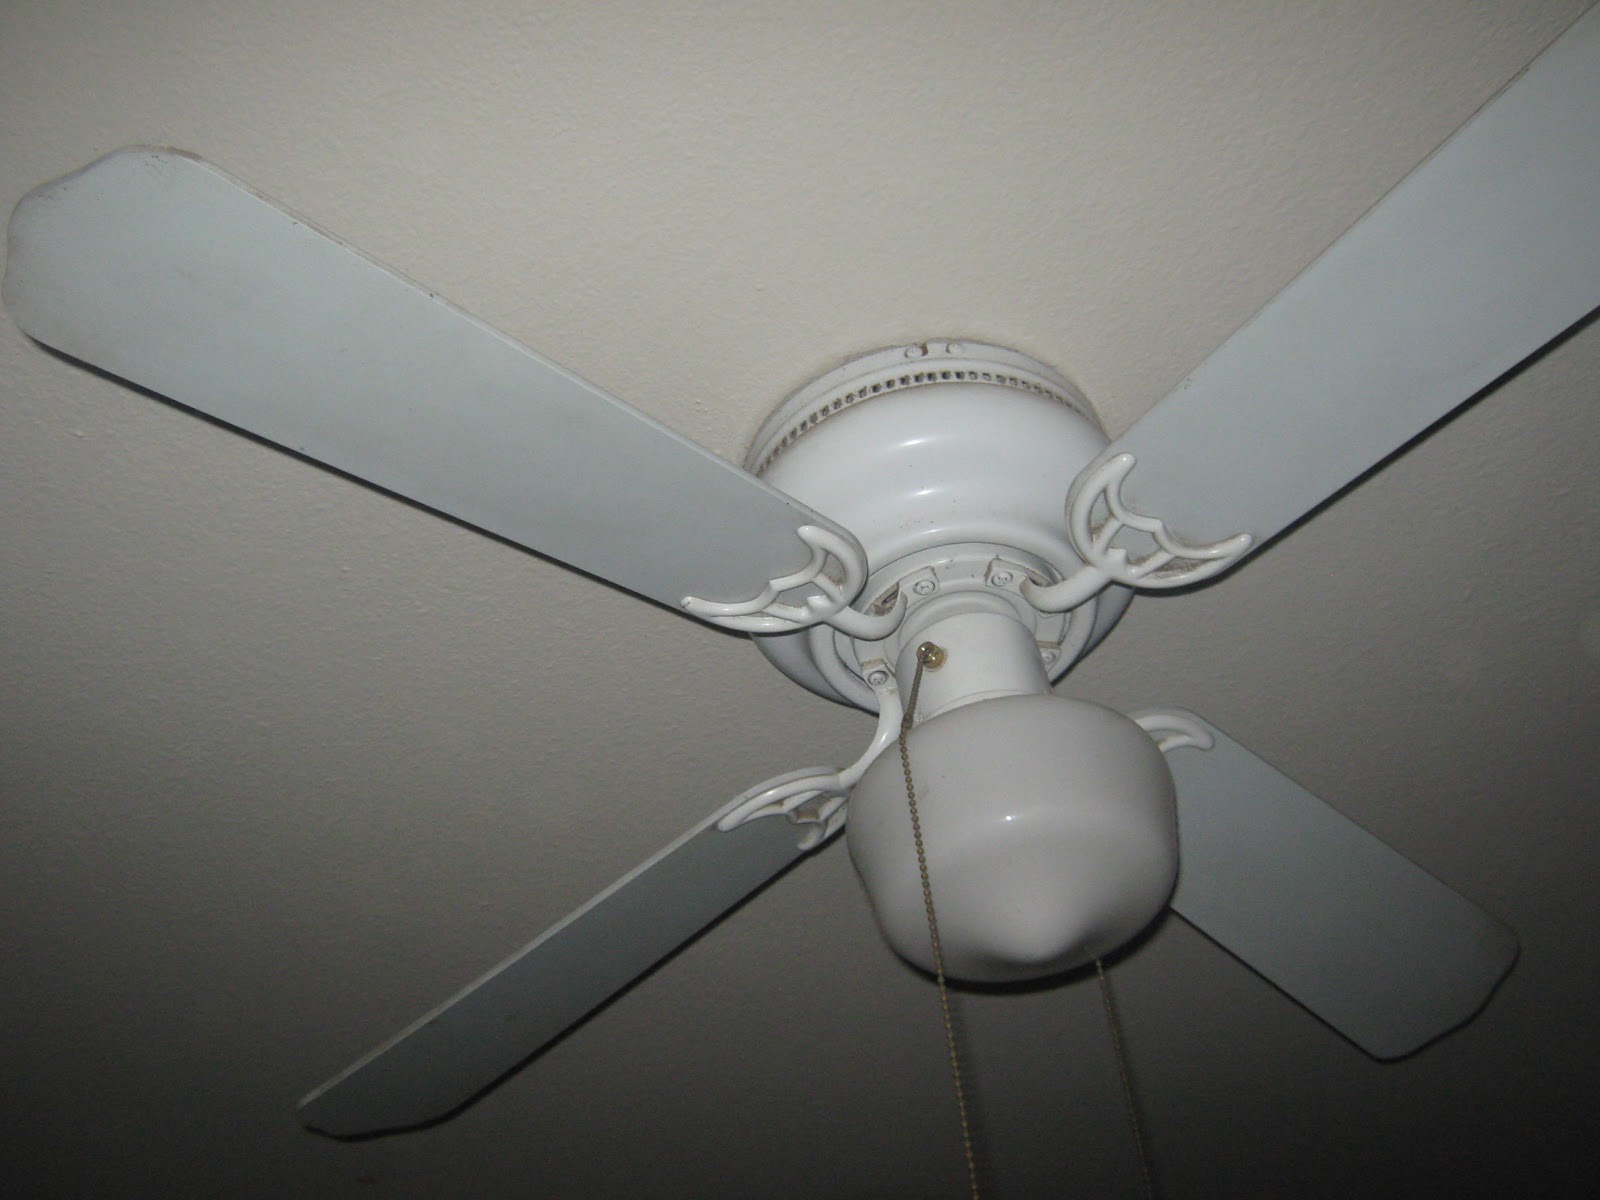
Onward - a couple more areas needed dusting and straightening....


Yeah. The ceiling fan was gross!  I used a duster with an extension handle on it to reach it.  Funny how those things get so dusty when they are constantly moving!
 
Anyways... that was my living room project!  It's nice to know that there are specific "homes" for things in my living room now, and easier to maintain with specific places to put things.  If it doesn't have a home in the living room, out it goes!

Thursday, January 31, 2013

Product Review - AND ~ A Giveaway!

Have you ever used a product and been so impressed with it that you wanted to tell everyone you know about it?  You feel like a walking commercial when you do that!  But when a product really works, and leaves you feeling happy and satisfied, you want to share that with your friends and loved ones! 
 
This is how I have felt since I started using Shaklee's Basic H2 Organic Super Cleaning Concentrate.  I have been telling my mom, my friends, my online friends... just about everyone I know about how good it works!  They probably think I'm a little crazy... I mean, who gets excited about a household cleaner?
 
Well, first of all I ordered it because I am interested in using products that are less toxic and less dangerous around kids and pets.  Have you read the warning labels and ingredient labels on some of your store-bought cleaners?  I have, and they give me chills.  As a mother of three children and also the owner of a cat who is very much a part of our family... when I heard there was something out there that was safer and more natural, I was excited to make the switch!
 
The thing is, I just wasn't expecting it to actually CLEAN as well as it does!
 
First impression;
I read the directions.  "Mix 1/4 of a teaspoon with 16 oz of water in a spray bottle."  I looked at the spray bottle, measured out 1/4 of a teaspoon, and thought... "surely this isn't going to be enough!"  A fourth of a teaspoon seems so small!  I shrugged... if I needed to add more, I would add more.  I started cleaning.... and then I started to really get excited!  Dirt was coming off of surfaces in my home that I thought it would never come off of!  Things were coming clean with just a couple gentle wipes, that normally would have taken some extra scrubbing.  There is virtually no smell... in no time my kitchen was sparkling but there was no chemical smell in the air!  Get this; as I was cleaning my kids came in.  I said, "Watch this!" and sprayed some on the refrigerator and we watched it start to come clean right before our eyes.  My kids got excited and wanted to take turns using the spray bottle to clean off walls and counter tops!  I am not making this up, this stuff made my kids WANT to clean!  And as a bonus I wasn't worried about my son -who has asthma - while he was using the product... no coughing or wheezing occurred which sometimes happens when he is around the fumes of the harsh chemical products.
 
Since then I have been using the Basic H2 all over my house... to clean walls, counter tops, windows, floors... it really is possible to use on everything!  I have been looking at my house in a whole new way, instead of looking at some things as "terminally dirty", I now look at them and think; "I bet the Basic H2 can take care of that!"  And I haven't even used an 8th of my bottle yet!  Since it's so highly concentrated, a little bit goes a long way!  I have been able to throw away various bottles of toxic cleaners under my sink and now just have one product for cleaning around the house.  Good-bye Pine-Sol, Windex, and Mr. Clean!  Hello Shaklee!
 
Here's the exciting news!  I am so happy with this product, I want to share it with you!  I want others to have a chance to experience what I have!  You can't buy Shaklee products in the store... you have to buy them from a distributor.  Shaklee has some other great cleaning products... from laundry detergent to dishwasher detergent.  I would be happy to tell you more!  Shaklee also has nutritional supplements for adults and children, weigh loss products, and beauty products... all natural, all designed to be safe for you, safe for your home, safe for your family!  When you sign up for a Shaklee Membership, (less than $20) you get a discount on all their products, and you get an inside look at everything they have to offer.
 
I am going to give away one free bottle of Basic H2 Organic Super Cleaning Concentrate!  A $12.15 value... one bottle of concentrate makes 48 gallons of household cleaner!  Everyone who signs up the be a member or distributor in the month of February will have their name entered in a drawing!  At the end of February, I will draw one lucky winner to receive the free bottle of Basic H2!  And you will already be a winner when you sign up for membership because you will be giving yourself access to all of Shaklee's other great products!
 
If you are interested, or would just like more information, please e-mail me at mama_mcd@live.com with "Shaklee" in the subject line.  I will be happy to answer any of your questions, and tell you more about Shaklee products and opportunities!


Monday, January 21, 2013

D.I.Y. Laundry Essentials!

Recently a friend shared with me this great blog post with some wonderful DIY, Home-made laundry essentials!  I have already been making my own laundry soap for about 2 years now, but I thought this post had some great tips and I wanted to pass it on!
Top 3 DIY Lavender Laundry Essentials!

So check it out!  Today I had a "Laundry Day"... I washed some laundry, made the Lavender Scented Dryer balls as mentioned in the other blog, also made the Lavender Scented Fabric Softener!  I was already using Vinegar as a fabric softener but I loved the idea of making it scented!  Then I washed some more laundry because I had to try out my new products!  I must say I Love the Fabric Softener and Dryer Balls!  Thanks so much, Camp Wander!!

I went ahead and made another batch of laundry soap, since I was almost out.  I make a liquid soap version vs. the powdered version mentioned at the other blog, but the ingredients are pretty much the same!
  Here is what I do;

Supplies;
1/2 Cup Borax Powder
1/2 Cup Arm & Hammer Washing Soda
1/2 bar of Pink Zote Soap
* 4 scoops of Oxi-Clean (using the scoop provided in the container... looks like it is also about 1/2 cup)
A cheese grater
a 5 gallon bucket to mix everything in
a medium sized pot for the stove

Directions;
Grate the 1/2 bar of Zote soap with a cheese grater.  You don't have to use the Pink kind, the plain white bar works fine too.  You can also substitute Fels-Naptha soap.  These can both be found in the laundry section of most grocery stores.

In a separate bowl, mix the dry ingredients... the Borax, Washing Soda, and optionally the powdered Oxy-Clean (Oxygenated Bleach).  Set this aside.

On the stove, bring the medium saucepan filled with water to just below boiling.  Turn the temp down to medium, medium low to keep it warm.  Slowly add in the grated Zote soap while stirring, you want it to melt evenly and avoid clumps and I find it works best if you just sprinkle a little at a time into the hot water while stirring.

In the 5 gallon bucket, fill it half way with warm water and add the dry mixture of Borax, Washing Soda, and Oxy-Clean.  Mix until all the dry ingredients are dissolved.  Slowly pour in the melted pink Zote & water mixture from the pan you had on the stove.  Mix well.  Add more water until the bucket is full, mixing well. 

Cover the bucket with Plastic Wrap, set it aside somewhere safe and let it rest for 12 to 24 hours.  It will thicken and become more gel-like.  Mix again, and then you can add it to empty bottles to be used for laundry!  I used empty bottles from store-bought detergent I had bought before, because they have the lid for measuring and store easily.  Hard to believe that I have been using those same bottles for nearly 2 years, just refilling them with my own home-made soap!

For washing I use 1 cap full of detergent for small loads and 2 cap fulls of detergent for large loads.  I sometimes add more Oxy-Clean if the clothes are particularly stained, or for my work shirts which need to be very white!  Adding 1/2 cup of plain white vinegar to the water at the rinse cycle really helps soften the clothes and leaves them deodorized.  Check out that blog post above to learn how to make the scented version of this fabric softener!

After making my Dryer Balls, my Laundry Soap, and the Fabric Softener, I decided I needed to clean my laundry room, because these great products need a nice cozy place to live, right?  I swept, mopped, and wiped down all the surfaces in my laundry room (top of washer & dryer, and top of the water heater)  Now I have lots of lavender-scented clean laundry to fold and put away, but that doesn't sound too terrible!  I am gonna sit down in front of the TV and start folding!  Sounds like a great way to wind down from my busy day!

Friday, November 16, 2012

Home Organization Challenge - The Kids' Closets (week 8)

So I have been loosely following along with the 14 Week Home Organization challenge over at A Bowl Full of Lemons.  About 2 weeks ago I did the Kid's Closet Organizing Challenge, but hadn't posted it on my blog.... until now!

Check out the great advice and beautiful inspiring pictures at A Bowl Full Of Lemons - Organizing The Kid's Closets post! 


And here is what I did with my kid's closets!

My son's closet;

BEFORE

AFTER
bought some hangers and hung up his shirts on one side, and his sweaters/jackets on the other side.  On the top shelf is one pair of shoes that are too big for him (in the box), and the other box is empty.  There is a duffel bag/backpack (empty) on the top shelf also.

The Bottom portion of his closet - BEFORE
Pay no attention to the big white stain on the carpet.  A bucket of paint got spilled after we painted his room.  But this picture is just to how you the mess... as a boy... when he is told to "go clean your room", it involved picking stuff up and throwing it into the closet!

The bottom portion of his closet - AFTER
I got him some bins to keep things in.  The plastic drawer thing used to hold his clothes, but we moved a different dresser into his room for his clothes and this one is now used for toys.  Each drawer holds a different kind of toys... green is the play tools and play dishes for playing house.  Red holds all his toy dinosaurs, and yellow drawer is just all the various small plastic toys.  On top of the dresser are two other boxes... one holds toy cars (Hot wheels/Matchbox) and the other one holds plastic army men.  The large bin on the right (behind the pirate ship) holds all his larger toys that are too big to fit on the drawers or small boxes. 
 
Two weeks later - he is still doing a great job keeping his room clean, with some gentle reminders from us of course!  But when he does clean up, he is putting everything in it's proper box!
 
The girls' closet.
My two daughters share a bedroom.  This "Before" picture isn't really the Real Before Picture.  This is after the girls, myself, and my husband had to go in there with trash bags and clear out their room because no one could walk through it.  It was a complete disaster... so this "before" picture doesn't look too bad considering the room had a major overhaul the week before!  But there was still room for some improvements!
Girls' Closet - BEFORE


Girl's Closet - AFTER
moved the metal bed frame to the back yard.  Got some more plastic bins for their smaller toys and organized them.  9Barbies, Barbie clothes, ponies, tea party)  Went thru the boxes and threw most of the contents away, filed the rest.

Girls' Closet - top shelf BEFORE

Girl's Closet - top shelf AFTER
Hmm... lots of room! All that remains is one box with some keepsake school parers, and I moved the sheets that the girls use on their bed to their closet, freeing up more space in my linen closet!
 
Fellow Procrastinators, listen up! These projects took A LOT LESS TIME than I thought they would.  I was able to complete both projects on my day off, just working a little at a time until they were done.  Once again I revisit the lesson that it always looks worse than it is, and doesn't take much time to fix once I focus and just do it!


Home Organization Challenge - The Office (week 4)

I actually did this Home Organization challenge a few weeks ago, but I am just now finally getting around to posting it on my blog.  These challenges are a part of the 14 week Home Organization Challenge posted by A Bowl Full of Lemons.  You can check out the Home Office Organization post to see the tips and advice... this was my inspiration for getting my Home Office area organized!  There are lots of great tips and ideas here please check them out!

My Home "Office" is one of those rooms that is ALWAYS getting cluttered and messy!  It was pretty much a disaster when I began this process, but disaster was pretty much the norm for this room!  Since I have gotten it decluttered, it has been much easier to maintain.  (Although right now as I type, I am looking around and I see it needs some work!)  But even when it does get messy, it's been so much easier and less time consuming to clean.  This is because; 1) I got rid of LOTS of Clutter... so there is less "stuff" to junk up the place.  and 2) Everything that I kept now has a "home", or a place it belongs.

First of all, getting rid of the junk and organizing everything else meant pulling EVERYTHING into the middle of the room and sorting thru this huge pile;

Then I spent a long time sorting through everything, throwing a lot of stuff away, and sorting the "keep" stuff into piles so that similar items would be grouped together. This kind of decluttering can be time consuming, don't expect to get thru a pile like this in less than an hour.  It helps to break it up into small 30 minute work segments, and give yourself breaks.  My whole office organizing project took me all week, because I would work on it for an hour or tow a day, 30 minutes at a time.

Here are the before and after pictures;

Side of Entertainment Center.  BEFORE


Side of Entertainment Center AFTER
The upper shelf now holds all photo albums & scrapbooks
The lower shelf has two plastic bins, one for photos that have not been placed in photo albums or scrapbooks, and the larger bin holds all of my scrap booking supplies.  These scrap booking supplies used to be in a different bin under the craft desk, which you will see in later pictures.

Under the entertainment center - BEFORE

Under the Entertainment center - AFTER
Just DVD's and CD's.  All that other stuff either got thrown away or found a new, more organized home to live in! (organized elsewhere in the office)
 

The corner behind the door.  BEFORE

 
The corner beside the couch - BEFORE

I am showing you these two areas, because well, obviously I wasn't making very good use of these spaces.  The corner by the door held NOTHING, it was just where random stuff would get placed and where cobwebs would collect.
The bookshelf next to the couch?  Well it wouldn't fit anywhere else in the room, so it had to go in sideways.  Which resulted in it not being used very well for a storage area, because it was NOT accessible.
BUT! When I realized that I could move our File Cabinet to the empty corner, I also realized that if I moved the file cabinet... it would give enough room to place this bookshelf along a different wall and it wouldn't have to be placed like this.
The problem was, this is where the file cabinet was;
Corner Shelving - BEFORE
Yep... the messy corner.  This is where the majority of that stuff piled in the center of the room came from.  I took everything out of this corner, threw it in a pile in the middle of the room, and started sorting it.  THEN....

Corner Behind the Door- AFTER
I moved that file cabinet (with help from hubby) to that empty corner.  Using the top of it to store board games.
With the file cabinet moved out of the way, I was able to move that ill-placed bookshelf from the corner by the couch (push the edge of couch into corner) and place the bookshelf over here in the corner....
Corner shelving - AFTER
This, obviously, I also after sorting through all the clutter and labeling everything!  Art supply bins, school/homework study supplies, children's educational books, and a box holding my stationary, envelopes & stamps.

Once again, just for emphasis;


Just to the right of these shelves is our art/craft/homework desk. 
Top of desk - BEFORE
As you can see, not much crafting was going on here, and the kids have been doing their homework at the kitchen table.  And yes, those are my husband's work boots on the table.  Don't ask me why.  Although, when messy is the norm, and a surface looks as cluttered as this for so long, it basically INVITES things to be placed on it that don't belong there!  Lesson learned!

Top of desk - AFTER
Paper & coloring books stored in magazine bins. Supplies such as crayons, pencils, pencil sharpeners, erasers, etc held in the little bins.  I even found curtains to match the new bins I got!  (All found at Big!Lots)
 
Under the desk - BEFORE
Remember the scrap booking supplies in the box under the entertainment center "after" picture"?  And the Art Supplies in the bins in the corner shelf "after picture"?  Well this is where all that stuff used to live!


Under the Desk - AFTER
yep, nothing left!  All that lives here now is this purple bin which holds my daughter's Girl Scouts supplies.
 
Well, that was my week long organizing project in a nutshell, finally here for the world to see!  I hope this has given you some ideas!  No matter how messy and cluttered a part of your home is, I hope this post can give you hope and inspiration and show you that YES, it CAN be fixed!  Don't forget to stop by A Bowl Full Of Lemons for some more great home organization & home decorating tips and ideas!


Thursday, October 25, 2012

Home Organization Challenge - The Pantry - Week 3

I did this challenge back in September, and now I am finally able to share with you the pictures of my completely re-organized Pantry!  Thanks so much to Toni and all the other home organizers at A Bowl Full of Lemons for some great ideas and for sharing pictures of their pantries as well!  I got all the plastic bins at The Dollar Store, plus the door hanging shoe organizer was found for a few dollars at Family Dollar.  I made my own labels with tape and a marker... not as "pretty" as some other pantries I have seen in the challenge, but working on a budget we had to aim for functional!

 
The Floor on the Right;
BEFORE

 The Floor on the right;
AFTER
Canvas bag on wall hook holds all my canvas shopping bags.  The cardboard soda box in the upper right corner is for plastic bag storage.
The Floor on the Left;
BEFORE
 The Floor on the Left;
AFTER
Stacked up all the mason jars nice and neat.  Used the large plastic bin for extension cords, power tools, painting supplies.  (We don't have a garage so the pantry doubles as tool storage area)
 
Lower shelves on the Left;
BEFORE
 Lower shelves on the Left;
AFTER
Condiments, Hot Sauce, Rice, Soup
Coupon/Menu Planning, Pasta
 
Upper shelf on the Left;
BEFORE

Upper shelf on the Left;
AFTER

Breakfast foods, Drinks, snacks
 
Lower Shelves on the Right;
BEFORE
 Lower shelves on the right;
AFTER
Canning supplies, Canned vegetables
Canned beans, dry beans, Onions (fresh & Canned), canned tomatoes & tomato sauces
Upper Shelf on the right;
BEFORE
 Upper Shelf on the Right;
AFTER
assorted vinegars, assorted canned meats
My Pantry leads into the Laundry room, which doubles as our "Garage"... not a garage, but the place we store tools and garage type items.  So once I got the pantry done, I was motivated to keep going and do the Laundry Room & "Garage" area.  the Home Organization Challenge at A Bowl Full Of Lemons had each of these areas listed as separate weeks challenges, but you do what you can with the space you have!  Here are some pictures of my organized Garage/Laundry Room area, (just the afters, no before pics, sorry!)  But if you want more ideas for organizing your own Laundry Room or Garage, check out ABFOL!

I used a door hanging shoe hanger for frequently used household items like screwdrivers, duct tape, batteries, flashlights, even sunscreen lotion and bug repellent spray!

 
 Laundry Soap, laundry soap making supplies, bug spray
 Pet Care items, Car care supplies, bicycle repair stuff, miscellaneous tools, some cook books, and some DIY books.
 
I hope this blog post helps you with some ideas for organizing your own pantry, laundry room, or other storage area!  Don't forget, the real key to doing this was to GET RID of stuff you don't use or need!